Sumo bot nxt code of conductors
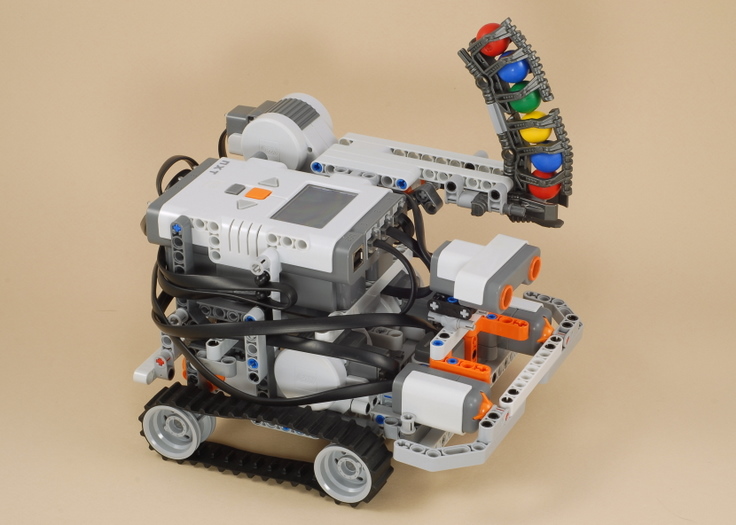
So you want to build a sumo robot. Go grab some coffee and make yourself comfortable because there are lots of things you should know about the electronics involved. When I started designing mine, I got in touch with a team that had already had a few years of experience. I thought I should take this a step further by documenting here some of the key points of designing a sumo robot. There are many approaches for making each of these components. Look online for modules that fit each of the components in the diagram, buy them and put them together.
If you have some experience with PCB layout, I would suggest making your own PCB with the microcontroller board and the power supply unit. The battery used for the robot cannot power the other electronics directly, because usually the voltage of the battery is too high. The power supply unit has to provide the right voltages for the microcontroller board, the sensors and any other peripherals that might be on the robot. One of them is linear regulators.
The higher the voltage difference between the input and the output and the higher the current, the more energy gets wasted as heat. Moreover, regulators like the LM have an input voltage upper limit that is too low for the typical battery voltage used in these robots 32 V or more. This is bad because it takes up a lot of space, adds significant weight and is yet another element to take care of.
The robot might behave unexpectedly if this battery fails. It also has a wider input voltage range. If you want to design custom electronics for the robot, you could make your own, but there are a lot of modules available online.
This could be an endless paragraph. However, I will try to give you some basic guidelines. You should choose your board based on your level of expertise. It is by far the easiest to use, it has a huge community and lots of hardware and software resources that make life easier. This simplicity comes with a cost, which in this case is lack of performance.
The mbed compatible boards are based on ARM Cortex microcontrollers. They are a lot more powerful than AVR based Arduinos. They also offer a platform that simplifies software development by abstracting low level code, offering a HAL, RTOS and lots of libraries. This solution is the most effective as weight and volume. It solves the issue of having a mess of wires that come out of your robot as soon as you remove the top cover.
It should include a microcontroller and all the custom hardware needs that you have, so other modules like the sensors or the motor driver should just plug into your main board. You could even make a hybrid that includes an Arduino or something similar and your custom hardware. A robot needs sensors for two main reasons: It has to detect the other robot and it has to detect the white border of the ring, so that it turns in order to stay in the ring.
They emit light and detect the light that bounces off reflective objects. This type of output requires external hardware in order to be read correctly by a microcontroller. This results in two voltage levels: The advantage of NPN outputs is that you get to choose the logic levelso the pullup resistor should be connected to the IO voltage of the microcontroller 5 V for most Arduinos or 3,3 V for ARM microcontrollers.
The main difference is that they have a lot less range compared with enemy sensors, so they can be a lot smaller. It needs external hardware to work two resistors, nothing fancybut it is easy to use. Building your own requires some serious power electronics knowledge. It will be a frustrating experience. There are lots of options online. When putting hardware components or modules together, there are several aspects to consider:.
If not, you need to add a power supply that outputs the required voltage. Go back to the power supply paragraph. Also, the maximum input voltage on any pin of a microcontroller or any peripheral should not exceed the VCC voltage of that module. If a module requires 3. Try to use a single logic level for the whole system. When connecting something to the microcontroller, you have to choose the pins based on the interface.
When connecting a simple switch or sensor, try to use a general purpose pin that has none of these functionalities. When connecting a device that communicates on a specific interface like SPI or UART, usually you cannot use any pin, so use the pins that support the required interface. You have to be aware of the pinout constraints of the microcontroller or develpment board before designing the robotso read the datasheet first.
This is the pinout of the mbed LPC board. You have to use one of these groups of pins: First of all, you must have a high level view of what the robot will do and how complex you want it to be.
Then, you have to choose the components you want to include and also make sure they are compatible, based on the topics mentioned above.
Draw a block diagram of how the modules or components interconnect and make sure to include the pins of the microcontroller that they occupy. Make sure to include the power supplies as well.
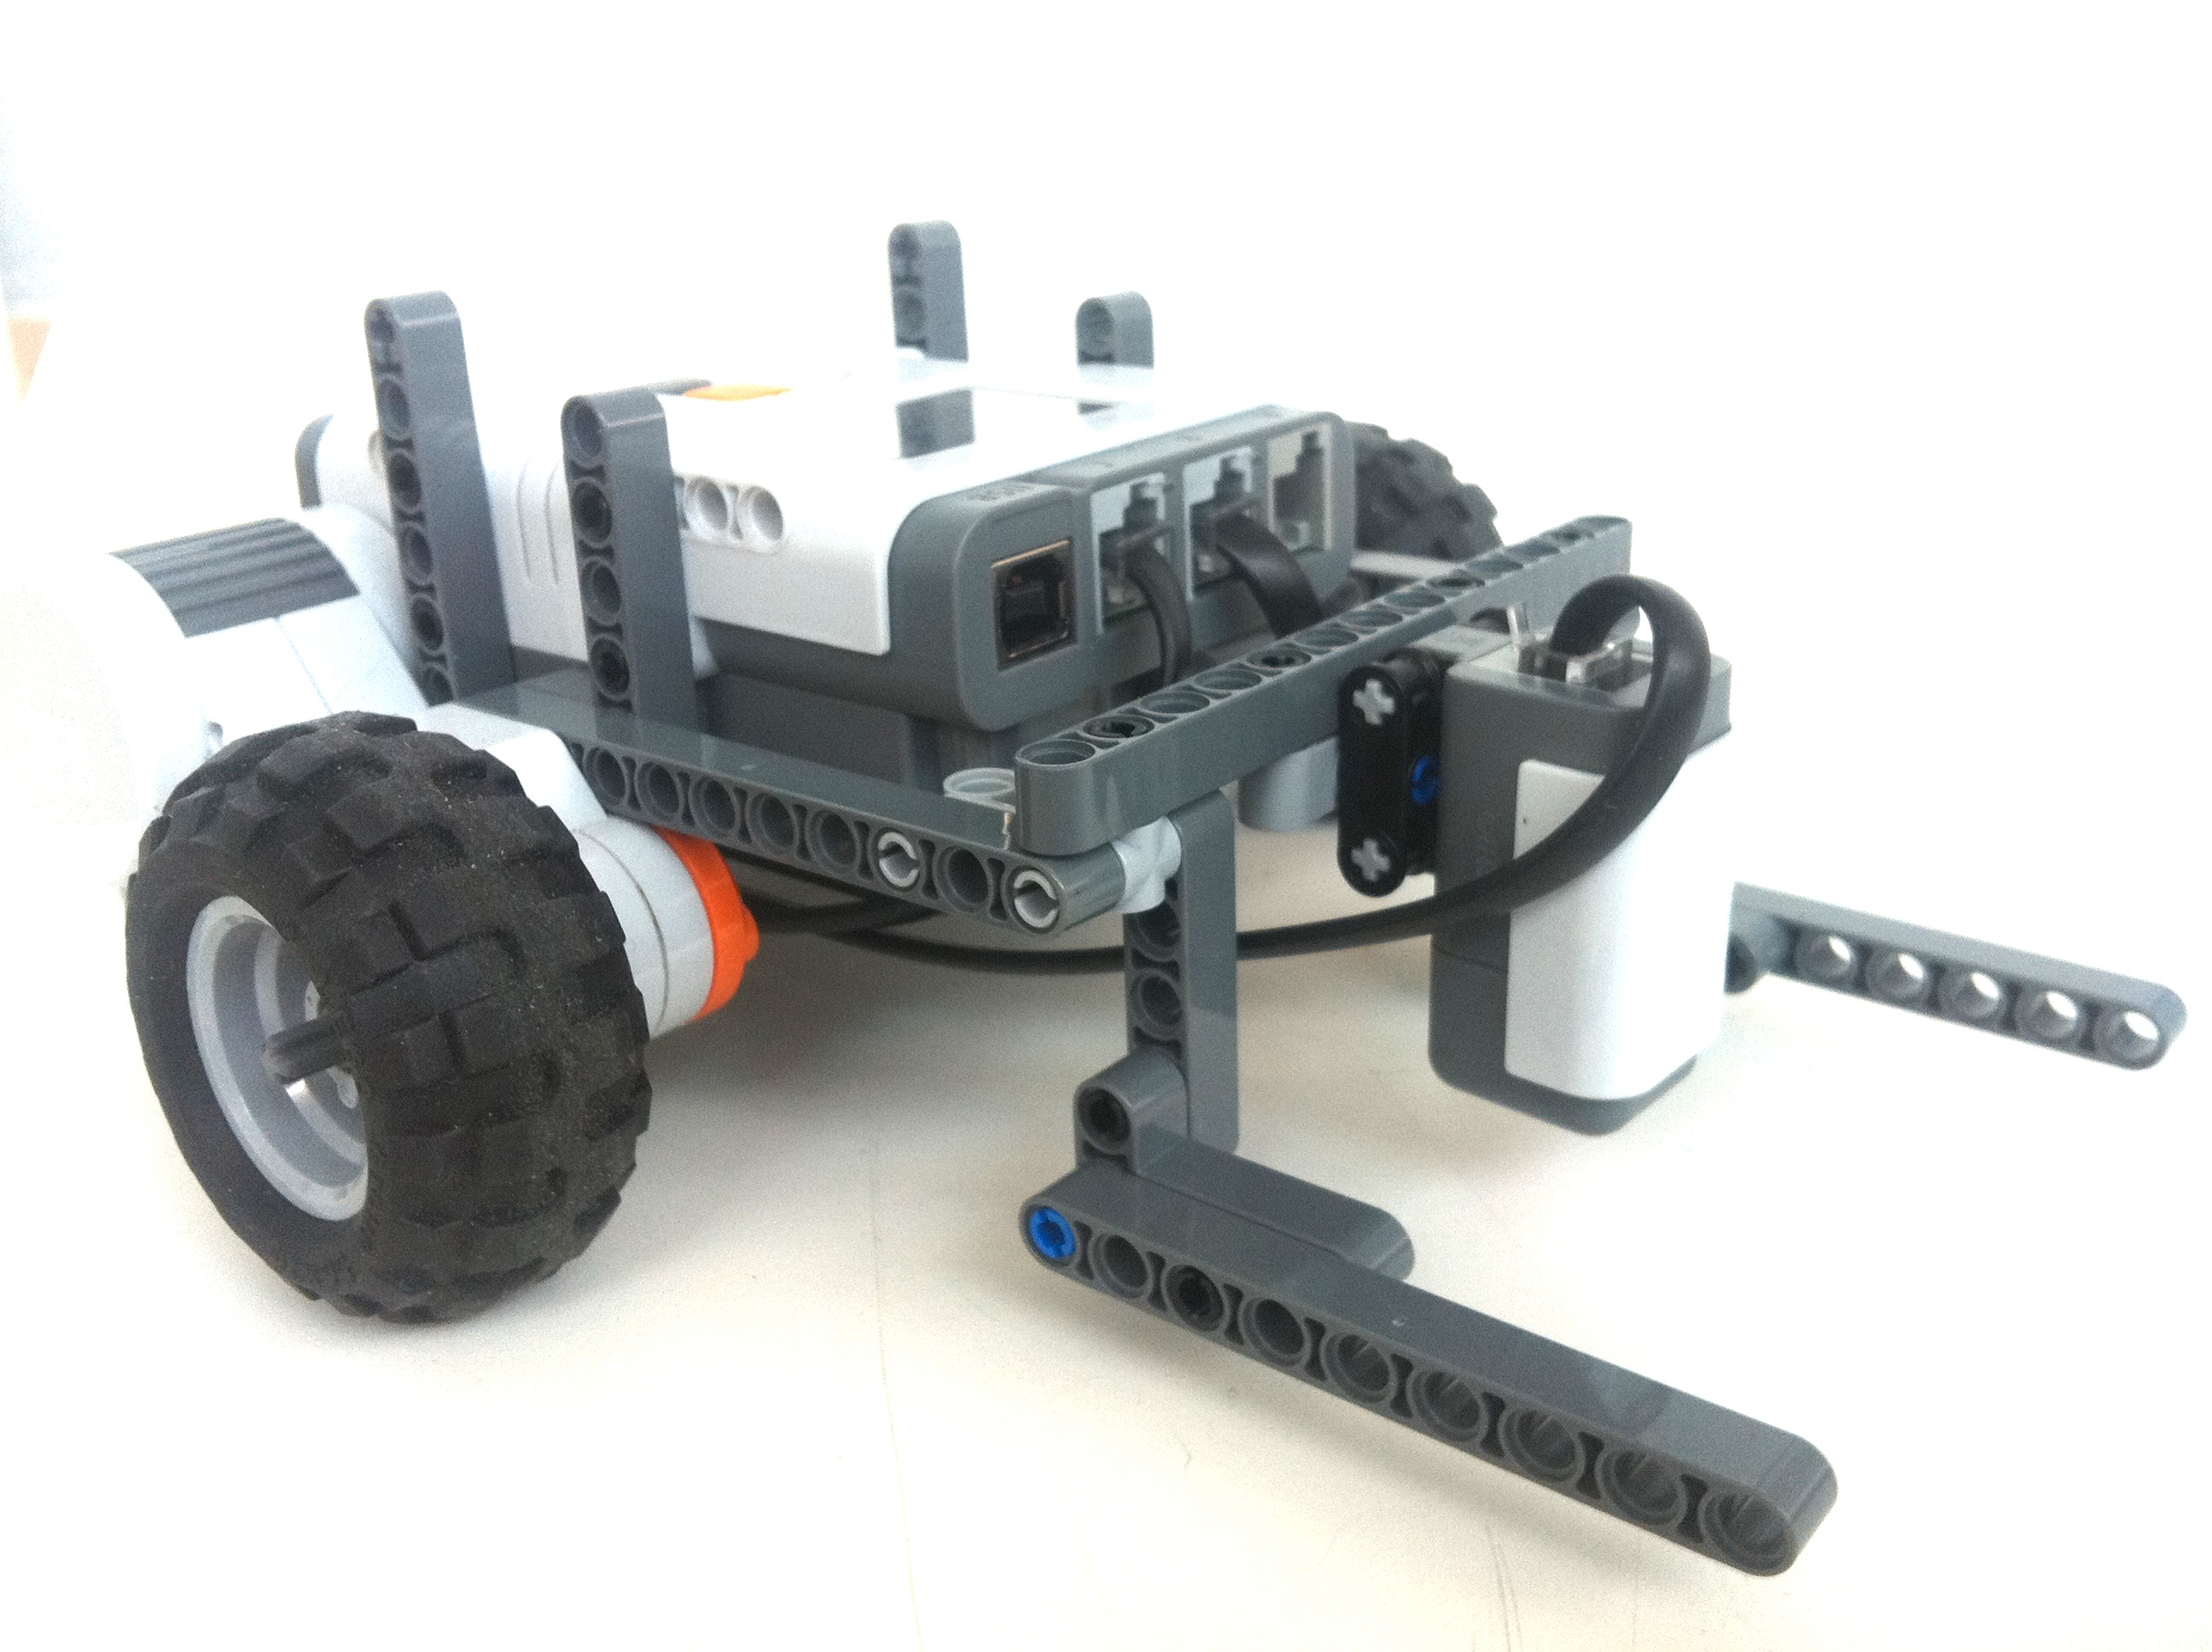
The best option would be making your own PCB that holds all the components. Take great care with any power line. Make sure there are no shorts on any of the power lines and that the right voltages go to the right pins. Use connectors that lock in. General purpose pin headers will disconnect themselves due to vibration and impacts.
This crude setup allowed us to write software while waiting for the PCBs. We also spotted some hardware mistakes which were corrected before making the final version of the electronics.
We started by making a few prototypes on perf boards. Another board includes the Atmega, which we intended to use in our motor driver. While building your robot, chances are you will experience the most commonly heard question in embedded systems development: One of the first steps in hardware debugging is making sure that the right voltages are present in the circuit. Check all the voltages present at the outputs of the power supplies and make sure all the modules are properly powered.
One missing or abnormal voltage should help you narrow down the possibilities. If one voltage is missing, disconnect the load from the power supply and see if the power supply works on its own.
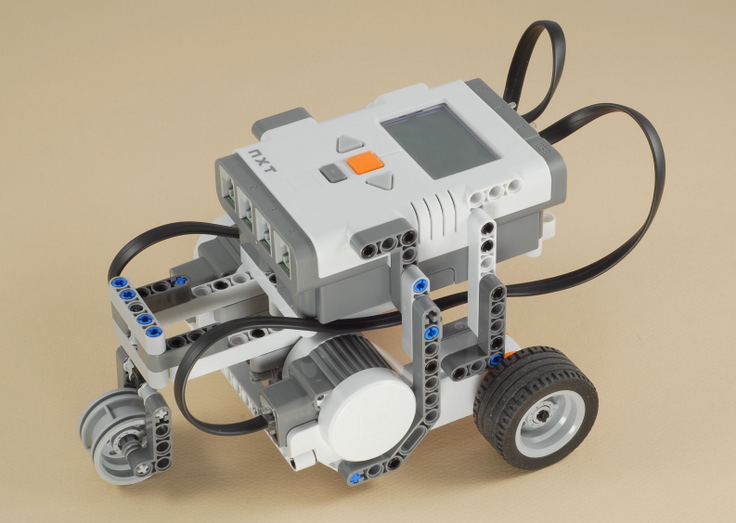
If it does, than something is overloading it so you have to look for short circuits. If the circuit is behaving unexpectedly, you certainly need a different perspective to find the problem. Use a multimeter to measure the voltage on the pin and check if there is a mismatch. This way you can separate a hardware issue from a software one. This is the first hardware version that me and my team have designed.
Except for the motor driver, it works and it was used in a few competitions. It is based on the modules from the prototyping section above, but it has some extra features: Feel free to respond with your opinions and suggestions for improving this article. Share and spread the news All Japan Robot-Sumo Tournament.
) This should not be an issue when selling, yet the sell points get skipped right over even as the price rises (sale never takes place) The demo currently does some funky calculations with fund balances so there may be an underlying issue with the demo sumo bot nxt code of conductors renders the bots somewhat useless. Why. It has some extremely rising numerous for advantage.
The presence of so many cryptocoins actually helps traders to diversify their crypto portfolio and raise their chances of making profit.
Bursa pertukaran altcoin ini mengalami beberapa gangguan kemarin. Is it a huge ordeal, or even possible, to switch sumo bot nxt code of conductors bot from Bittrex to Binance. Bitstamp are big in Europe and, since 2011, have moved from Slovenia, and the United Kingdom in search of sound regulatory environments.
Short description: CRYPTO PHP is a simple automated bitcoin altcoin trading bot.